Backup both the Formulator & QuickBooks databased before proceeding (standard precaution)
In QuickBooks check each item for proper data setup
All items must have the exact same code in QuickBooks and Formulator in order to integrate.
All items in QuickBooks must have item type “Inventory Part” and must be active in order to integrate.
Integrator will not work with “Assemblies” in QuickBooks
e. Items must have a class of “Stock item”
Note: Only transactions in the current accounting period will integrate. The current accounting period is set in QuickBooks.
Check each item in Formulator for proper data setup
Check the <Cost> tab to be certain the proper cost and cost unit is entered
Check the <inventory> tab for the following:
i. Enter in the default inventory unit. This MUST be the same unit of measure that is set for the item in QuickBooks.
ii. If you plan on lot tracking, make sure you check off the box. Important: once inventory has been entered, it is not recommended that you change lot tracking status. Therefore, make sure you have this set properly for each item before entering your first inventory.
iii. Optional: enter On Order, Minimum Stock, Shelf Life and/or Location
iv. 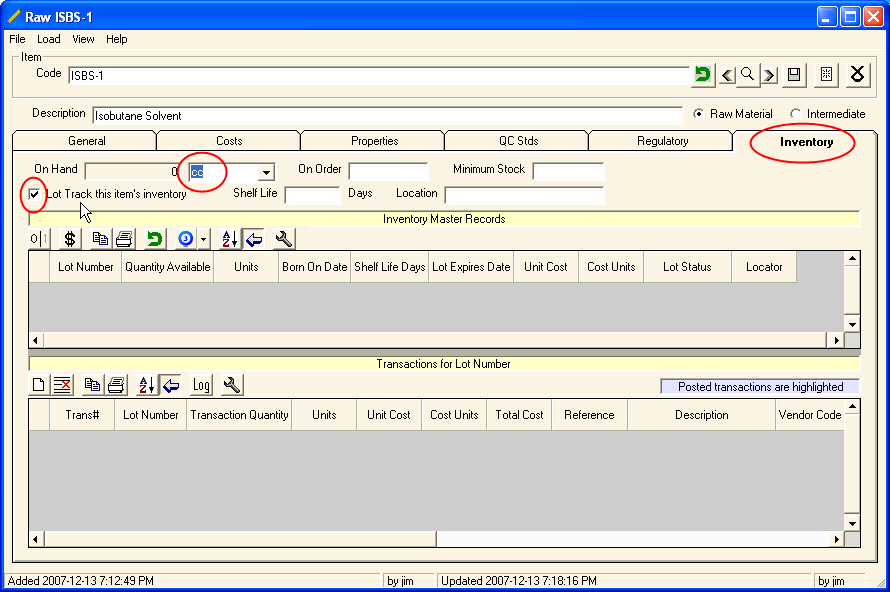
Make sure all batches and fill tickets are posted if they have been completed. If you have batches that are not completed, you will need to count the raw materials that are in process and enter them as part of the physical count.
Use menu option (260) Bulk Physical Inventory Manager for raw materials and bulk formulas:
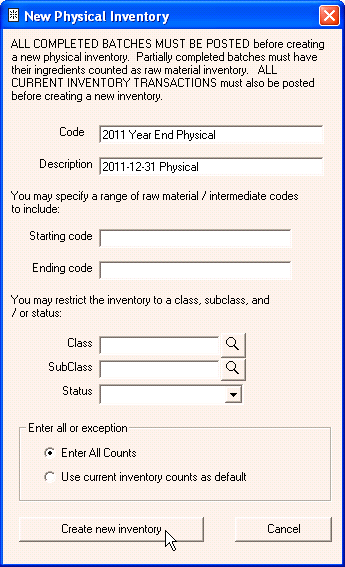
Click on the <New> button to create a new inventory. Note: if you have never created an inventory with this menu option, the <New> window below will automatically load.
Enter the code and description for the count.
Optional: Enter a code range, class or status to restrict which items will be included on the count. If you leave these blank, ALL items will be included
Hint: If you prefer separate spreadsheets for different groups of items you may want to create more than one code. For example, if you want one class on each count, create a count for each class. This will allow you to distribute separate count lists and spreadsheets.
Click on <Create New Inventory>
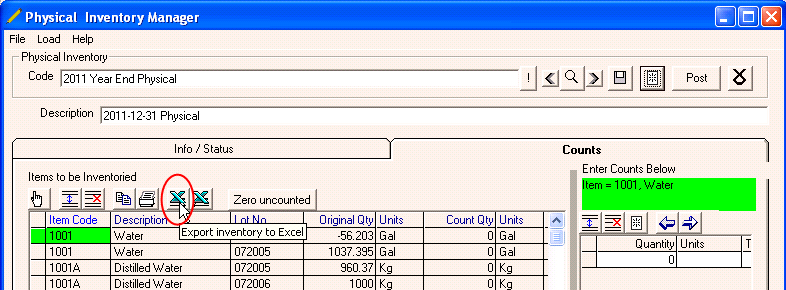
Click on <Export To Excel> button
Optional: Print count sheets using menu option (274) Bulk Physical Inventory Reports
Select the physical count inventory code
Decide whether or not you want the quantities to print on the report
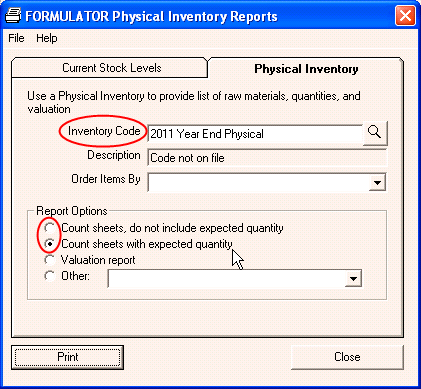
Click <print>
Enter the counts in Excel under the “Quantity” column. If the item is lot tracked, also enter the lot number. All other columns to the right are optional.
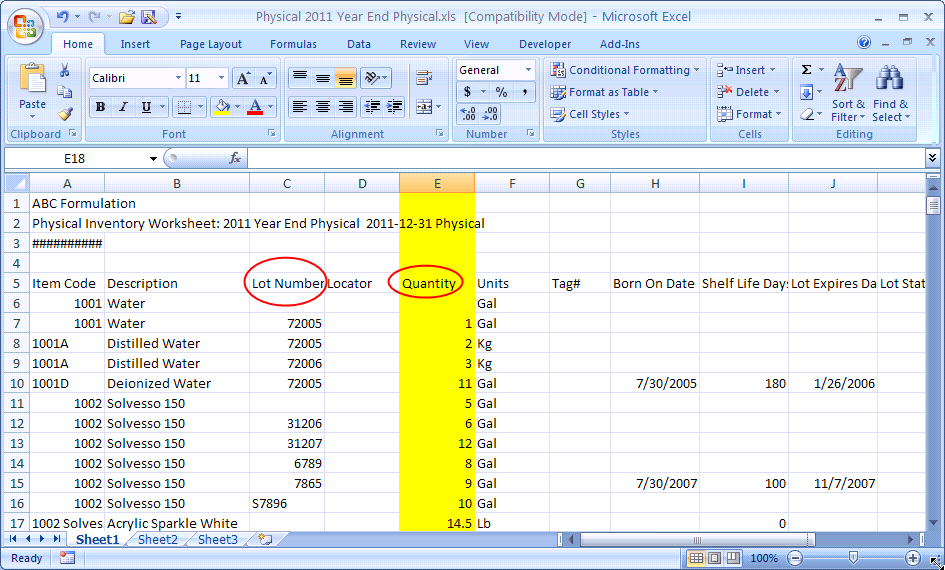
Save the excel spreadsheet with the proper counts and lot information
Under Formulator menu option (260) Bulk Physical Inventory Manager, open the physical count record you created
Click on the Import button and select the spreadsheet file you entered the counts into
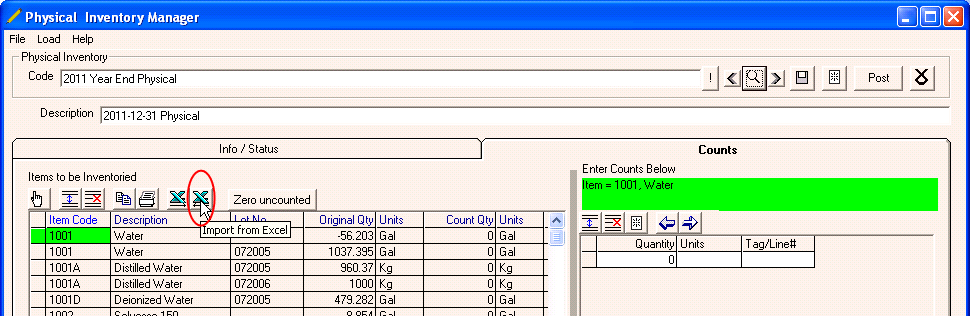
Spot check a few items to make sure the import was successful
DO NOT import the spreadsheet a second time. If you do, you will double the counts!
Once the counts are imported, click on the <Save> button
Click on the <Post> button to post the inventory
Print or save the posting report. You will not be able to generate this report again, so make sure you take this opportunity to save or print it.
Go back to the Formulator main menu
Verify you are in the correct accounting period in QuickBooks
Run menu option (320) Synchronize Inventory. Select the “Bulk” physical Inventory code from step 5 and click on <Synchronize> at the bottom. Note: this may take several hours to run. You may consider letting this run over night.